DIY Car Oil Change Guide— How to Change Oil Safely and Save Money
An oil change is a procedure that many drivers consider routine and entrust to service centers. It seems like a dirty, complex job that requires special knowledge and equipment. But in 2025, when the cost of auto shop services is growing exponentially, and the desire to better understand one's car is becoming the norm, the ability to perform this operation independently turns into a valuable and, most importantly, profitable skill.
A do-it-yourself car oil change is an excellent way to save money and, at the same time, have absolute control over the process. You personally choose high-quality consumables that meet your manufacturer's specifications, rather than relying on the service center's choice, which may use cheaper analogues. You can see the condition of the drained fluid with your own eyes, which can tell you a lot about the engine's health. You also get a wonderful opportunity to inspect the undercarriage, brake hoses, and exhaust system from below, noticing potential problems like leaks or damage in time.
Our oil change guide is your faithful assistant in this not-so-simple task. It is created for those who want to quickly learn to service their car themselves, whether they are an experienced car enthusiast or a novice holding a wrench for the first time. By reading our guide to the end, you will learn how to perform the replacement safely, quickly, and without unnecessary costs.
Oil Changing Today: From a Simple Procedure to an Important Skill
Over the last decade, the approach to car maintenance has changed radically. Modern engines have become more complex: turbocharging, direct injection, and start-stop systems place the highest demands on lubricants. At the same time, the compositions for engine lubrication have also changed significantly. High-tech synthetic compounds allow for longer change intervals but require strict adherence to specifications. Under these conditions, the importance of a correct and timely oil change process has only increased.
The tools have evolved as well. Bulky and inconvenient wrenches have been replaced by compact torque wrenches for proper tightening, convenient pullers for any type of filter, and all the necessary information about tolerances, volumes, and tightening torques is available on any smartphone.
Categories of Oil Changes by Vehicle Type
There is no universal approach to replacing this consumable. The regulations and nuances depend on the type of vehicle and its operating conditions.
Vehicle Type | Operating Conditions | Replacement Recommendations |
City Cars | Frequent short trips, traffic jams, "start-stop" mode | Shorten the interval by 1.5–2 times (every 5,000–7,500 km). Mandatory use of synthetics. |
Family Cars | Mixed cycle, carrying loads, long trips | Strict adherence to the manufacturer's schedule. Use of oils with official OEM approval. |
Sports Cars | High revs, thermal loads, track days | Maximum short intervals (every 3,000–5,000 km). Use of specialized ester-based oils. |
Old (High Mileage) | Increased clearances, possible leaks | Use of "High Mileage" oils with higher viscosity (within tolerances). More frequent level checks. |
Commercial | High mileage, heavy loads | Use of specialized oils for commercial transport with an enhanced package of detergents. |
Everyday Advantages of a DIY Oil Change
The decision to perform this procedure without the help of service masters provides several significant advantages. You pay only for the consumables, saving on labor, the cost of which at a service center can reach 50–100% of the material price. You also get the bonus of full quality control, being sure that the engine is filled with exactly the composition you chose, and in the right amount, without underfilling or overfilling. During the replacement, you conduct an early diagnosis by inspecting important components under the car. Finally, you get to know your car better, which adds confidence on the road and in future communications with mechanics.
Expert's Choice: A Step-by-Step Guide to Changing Oil
The replacement process requires care and the correct sequence of actions. Follow this guide, and everything will go smoothly.
Step 1: Preparation – Assembling the Arsenal
Before you begin, make sure you have everything you need.
- Tools:
- A wrench for the drain plug (box-end or socket of the correct size).
- A filter puller ("crab," chain, or cup type).
- A jack and a pair of reliable jack stands.
- A container for draining the used composition (with a capacity of at least your crankcase volume).
- A funnel for pouring.
- A torque wrench (highly desirable for proper plug tightening).
- Materials:
- New motor oil that meets your car's specifications.
- A new oil filter.
- A new sealing washer for the drain plug.
- Work gloves (the fluid is toxic) and rags.
Step 2: Warm-up and Safe Lifting
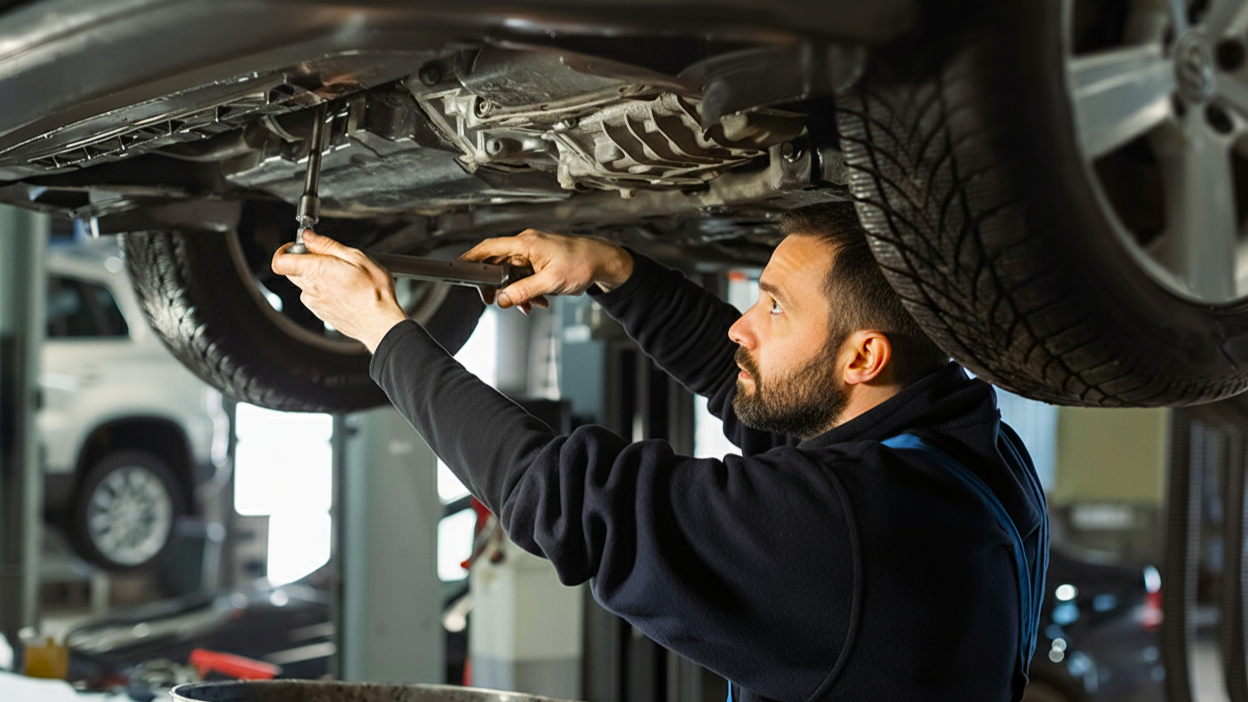
Warm up the engine to operating temperature (5-10 minutes of operation or a short drive is sufficient). Warm oil is more fluid; it will drain faster and more completely from the system, carrying away more contaminants. After warming up, park the car on a level, horizontal surface. Lift the front of the car with a jack and immediately place jack stands under the body's strong points (sills, frame). It is strictly forbidden to work under a car that is supported only by a jack!
Step 3: Draining the Old Oil – The "Dirty Work"
Get under the car. Find the drain plug on the oil pan (the lowest point of the engine). Place the drain container under it. Be careful, the engine lubricant will be hot! First, loosen the plug with a wrench, and then continue to unscrew it by hand, pressing it against the pan to avoid getting splashed. At the last moment, quickly remove your hand with the plug. Let the fluid drain completely. This usually takes 10-15 minutes.
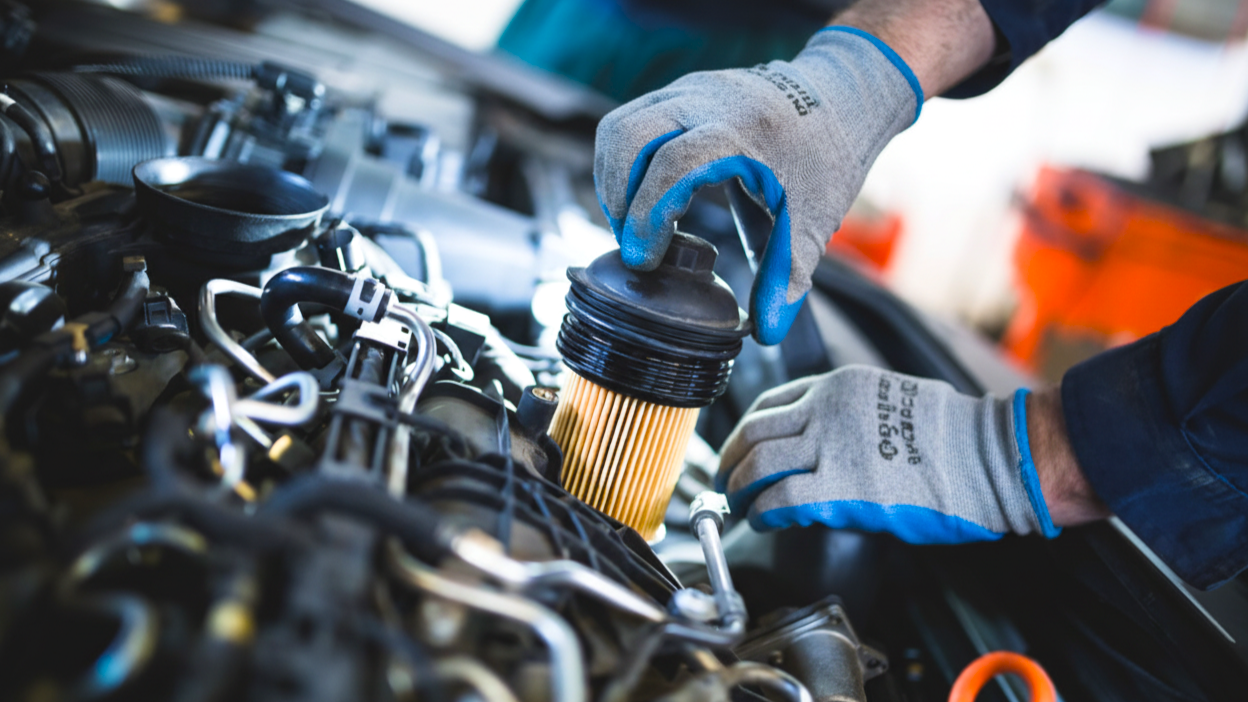
Step 4: Replacing the Oil Filter – An Important Nuance

While the fluid is draining, find the filter. Its location depends on the model (it can be at the bottom, side, or even top of the engine). Place a container under it, as 100–200 ml of oil will also spill out. Unscrew the filter with a puller counter-clockwise. Thoroughly wipe the seating surface on the engine block with a clean rag.
Take the new filter, lubricate its rubber sealing ring with a small amount of fresh motor oil. This will ensure a good seal and prevent the gasket from "sticking." Screw the new filter on by hand until the gasket touches the block, then tighten it another ¾ of a turn. Do not use a wrench to tighten!
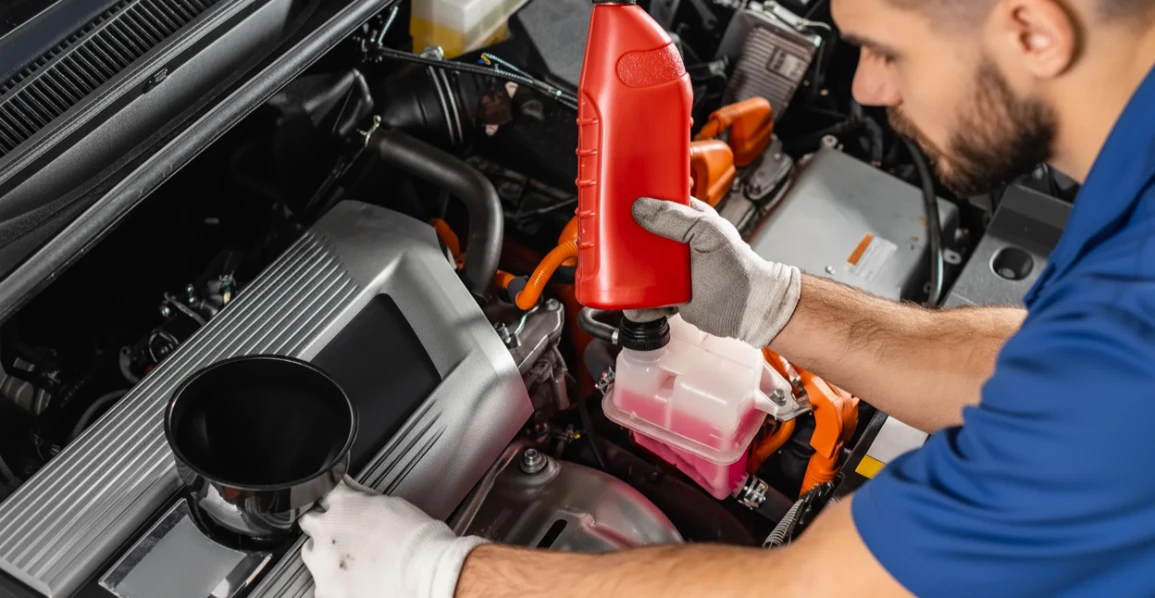
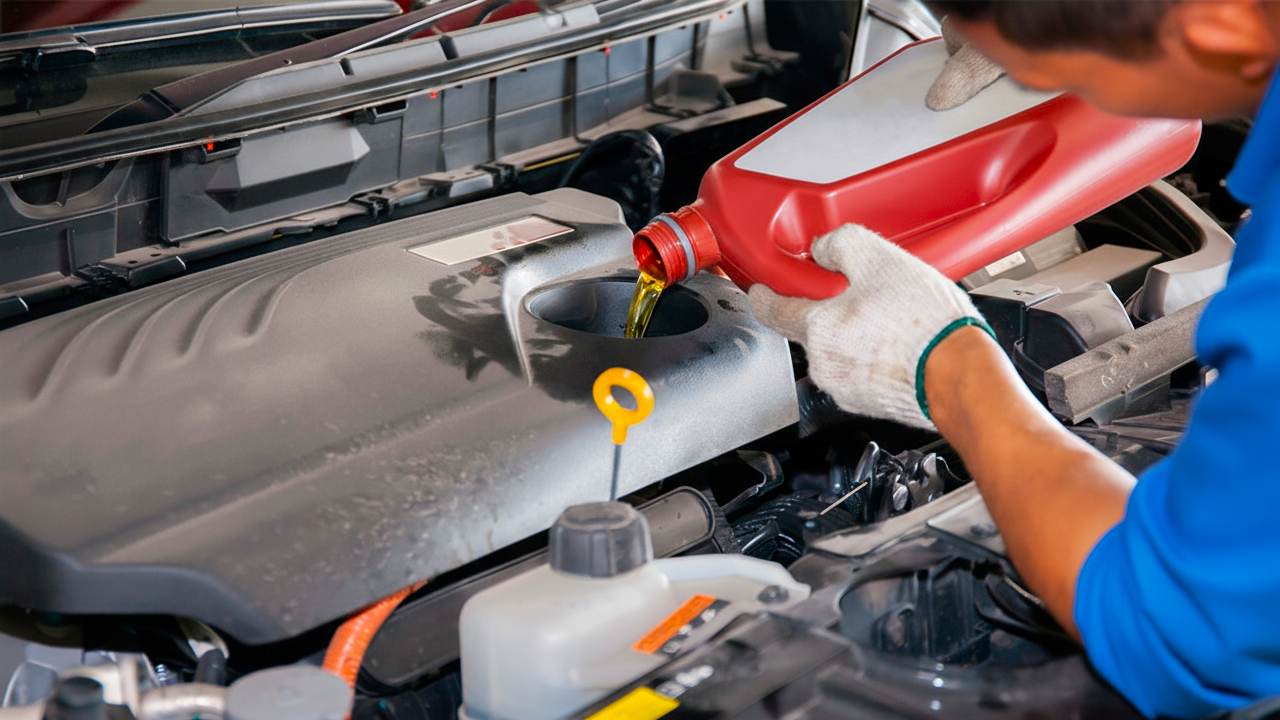
Step 5: Pouring in New Oil – Don't Rush
Wipe the drain hole, install a new sealing washer on the plug, and screw the plug back in. Ideally, tighten it with a torque wrench to the torque specified in the manual (usually 25–35 Nm). Open the oil filler cap on the engine. Using a funnel, start pouring in the fresh lubricant. Pour in about 0.5-1 liter less than the volume specified in the manual.
Step 6: Checking the Level – Measure Seven Times
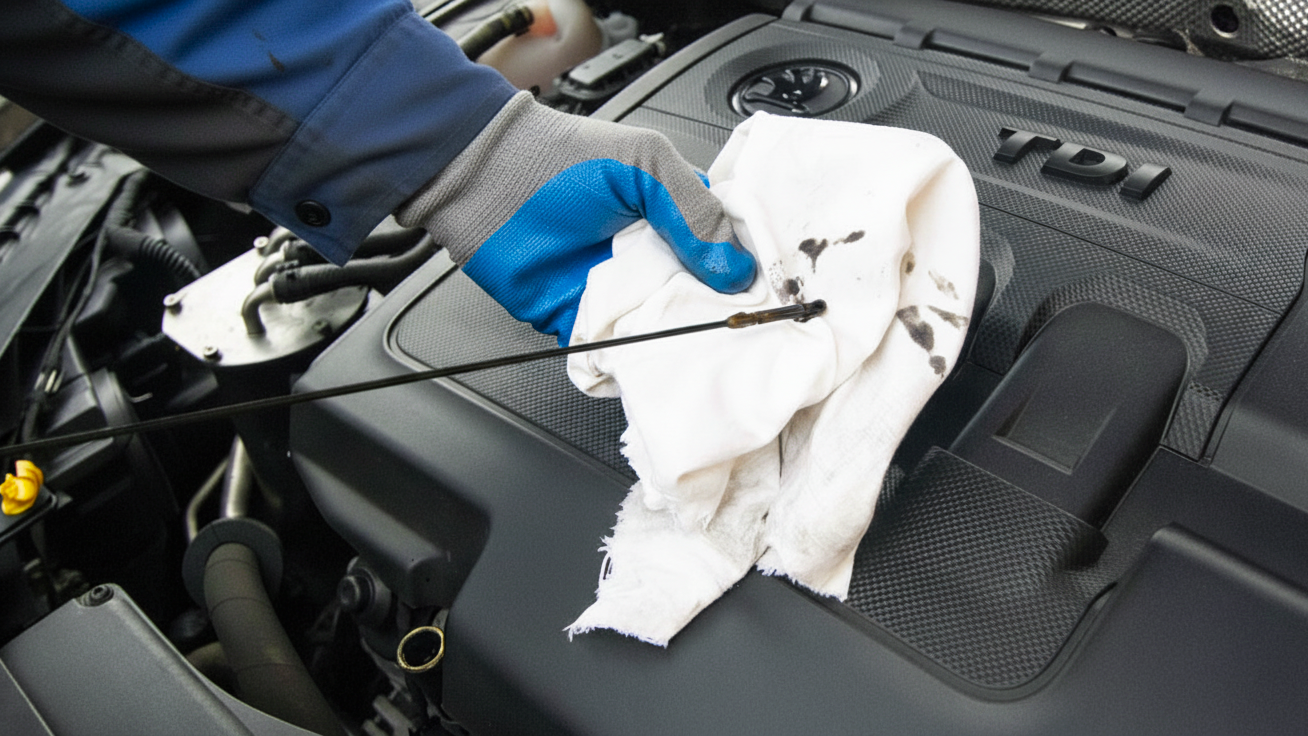
Wait 3-5 minutes for the oil to settle in the pan. Pull out the dipstick, wipe it dry, insert it back all the way, and pull it out again. Assess the level. It should be between the MIN and MAX marks. Gradually, in small portions, add oil, checking the level each time, until it reaches the MAX mark (or slightly below).
Step 7: Final Start-up and Check
Make sure everything is tightened. Start the engine. The oil pressure light on the dashboard should go out within a few seconds. Let the engine idle for 1-2 minutes. Turn off the engine. Wait 5–10 minutes and check the oil level again. It will drop slightly as some of the oil fills the new filter. Top up to the MAX level. Carefully inspect the drain plug and oil filter for leaks.
Step 8: Proper Disposal
Used oil and the old filter are toxic waste. Carefully pour them into a sealed container (for example, the canister from the new oil) and take them to a special collection point or any auto service that provides such a service.
Oil Change vs. Service Center vs. Express Change
Option | Time | Cost | Quality |
DIY | 1–1.5 hours | ⭐⭐⭐⭐⭐ (minimal) | ⭐⭐⭐⭐⭐ (full control) |
Service Center | 2–4 hours (with appointment) | ⭐⭐ (high) | ⭐⭐⭐⭐ (usually high, full procedure) |
Express Change | 15–20 minutes | ⭐⭐⭐ (medium) | ⭐ (low, often incomplete drain) |
When to turn to specialists? If you don't have a place (a pit, ramp, or a level surface), a minimal set of tools, or just the time and desire, it's better to entrust the oil changing to professionals. Express changes, where the oil is extracted through the dipstick tube, should be avoided – this method does not allow for the removal of all contaminants from the bottom of the pan.
Buyer's Guide: Choosing Oil and Consumables
But how to change oil correctly starts with choosing the right oil. The most reliable source is your vehicle's owner's manual. Look for the required viscosity (e.g., 5W–30) and the manufacturer's approval (e.g., VW 504.00/507.00). The presence of this approval on the canister is more important than a famous brand name.
Oil filters: original vs. aftermarket
An original filter is always a win-win option. High-quality analogues from well-known brands (Mann, Mahle, Bosch, Knecht) are also 100% suitable. Avoid the cheapest unbranded filters – saving a few rubles can turn into an engine repair.
Conclusion: A Smart Approach to Car Maintenance
A DIY car oil change is a useful and accessible skill. It not only saves you money but also gives you a deep understanding of your car's operation, turning you from a simple user into a knowledgeable owner. The oil change process is not as complicated as it might seem at first glance. So, try to do the work yourself, don't be afraid, and don't worry.
We hope our guide on how to change oil will help you quickly cope with the task and save a lot of money! The main thing is to follow the instructions, observe safety techniques, and then you will see that it is a task that every responsible car owner can handle.
