How to Remove Scratches from Car Paint: Complete DIY Guide
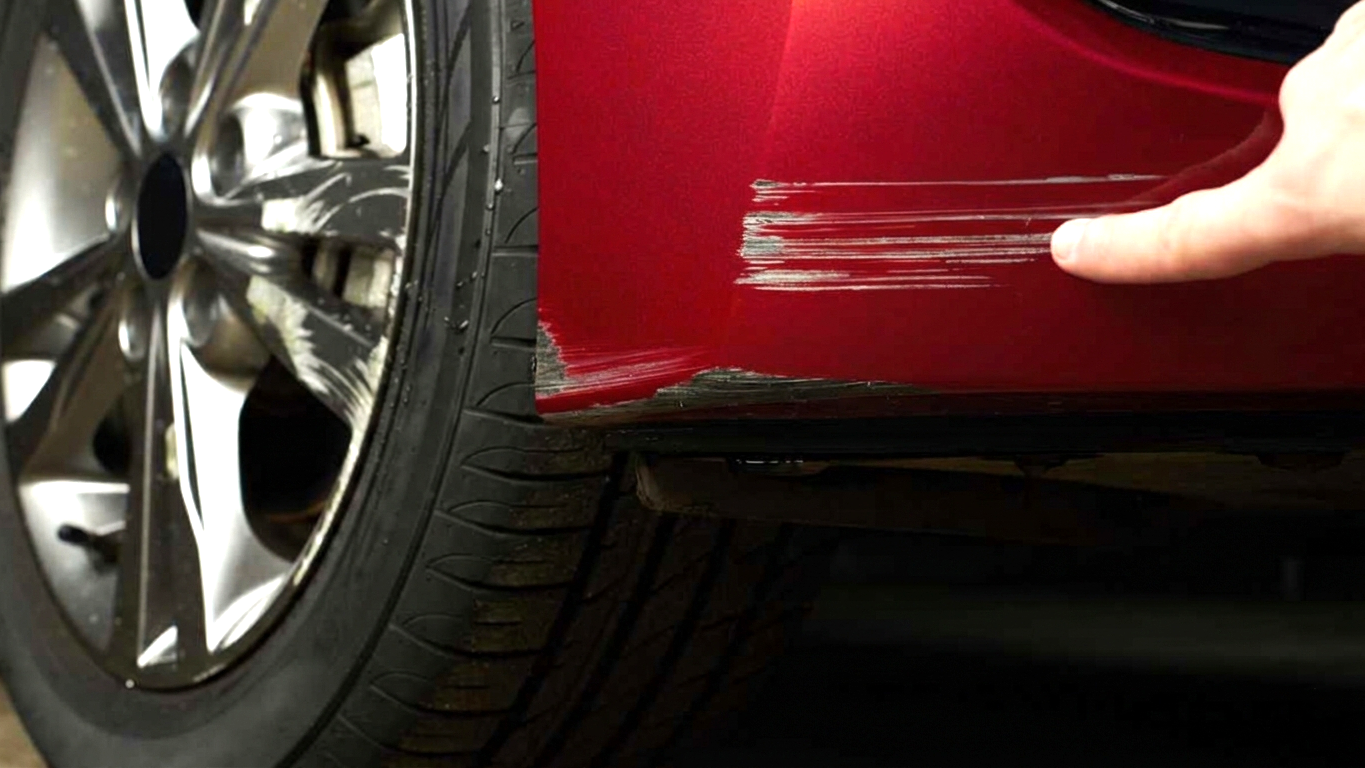
Every car owner is familiar with that sinking feeling: you walk up to your vehicle in a parking lot, admiring how it gleams in the sunlight, only to have your eyes drawn to an ugly, contrasting white streak across the bodywork. It is a moment of frustration that ruins the aesthetic appeal of your machine. However, this issue goes far beyond mere vanity. It is not just a cosmetic defect that lowers the market value of your vehicle; it is an open wound in your car's armor.
Modern automotive paintwork is a complex, multi-layered system designed to protect the underlying metal from aggressive environmental factors: moisture, road salts, ultraviolet radiation, and acid rain. Even a microscopic breach in the top layer of clear coat compromises the integrity of this armor. If the damage penetrates down to the primer or bare metal, the oxidation process begins almost immediately, even if it remains invisible to the naked eye for some time. Ignoring the problem inevitably leads to a scenario where a minor, inexpensive repair escalates into the necessity of repainting an entire body panel. In this extensive guide, we will break down the anatomy of paint, help you diagnose the severity of the damage, select the right tools, and teach you how to remove scratches from car paintwork yourself, achieving professional results without the exorbitant costs of a detailing center.
Anatomy of Paint and Diagnosis: Determining the Depth
Before you rush to the automotive store to purchase abrasive compounds or sandpaper, it is absolutely critical to understand the anatomy of your car's finish. A mistake during the diagnosis stage can be catastrophic; you might end up rubbing through the clear coat while trying to polish out a scratch that actually required filling with paint.
The paint system of a modern vehicle typically consists of four primary layers:
- Body panel (metal/plastic) - the structural foundation.
- Primer - a thin layer (usually grey, white, or black) that inhibits rust and provides a surface for the paint to bond to.
- Base coat (color) - the layer that provides the visual color and effects (metallic flakes, pearlescent finish).
- Clear coat - the thickest, transparent top layer that provides UV protection and the glossy shine.
The Fingernail Test
The most reliable and immediate way to diagnose the severity of the damage is tactile. Run your fingernail perpendicularly across the scratch.
- If your fingernail does not catch - the scratch is superficial and lies entirely within the clear coat. This is the simplest scenario.
- If your fingernail catches slightly but does not "drop" in - the damage is deep within the clear coat, likely grazing the top of the base coat.
- If your fingernail distinctly catches or gets stuck - this is a deep scratch. You have likely breached the base coat or penetrated down to the primer or metal.
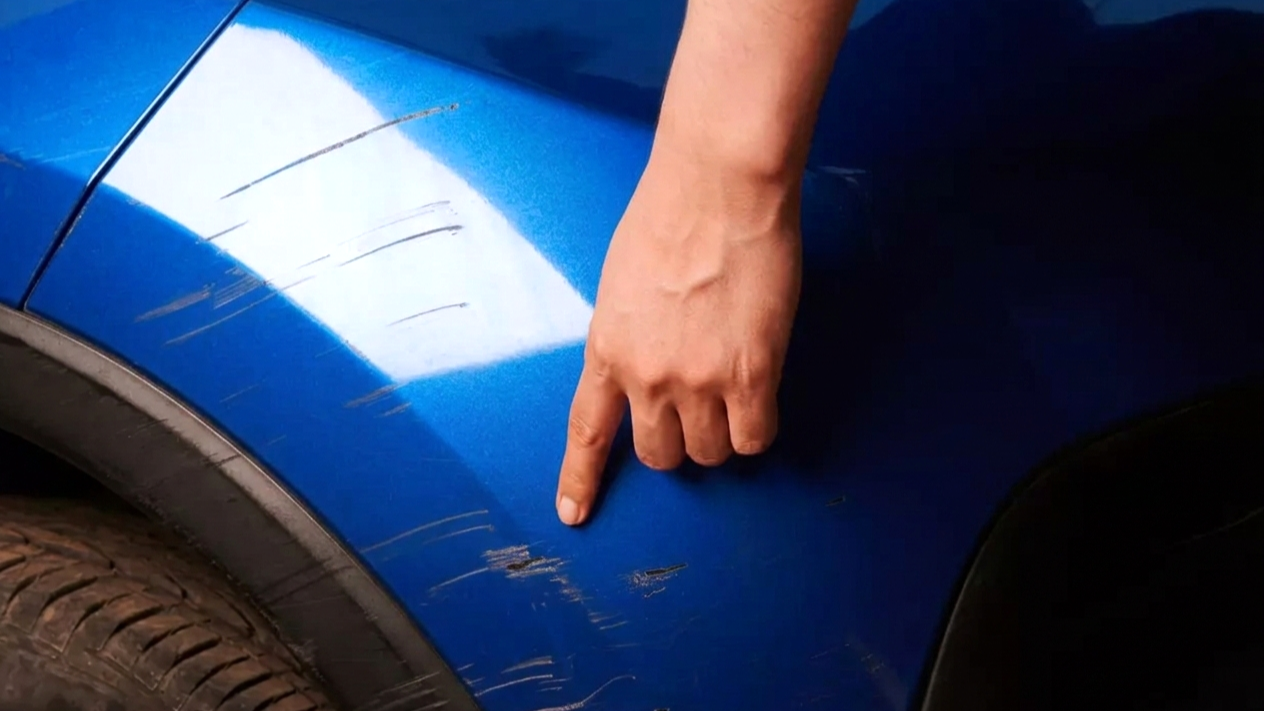
Visual Assessment and Classification
To effectively treat the issue, you must classify the car scratches accurately.
Scratch type | Visual characteristics | Repair complexity |
Level 1. Clear coat scratches (swirls/holograms) | Visible only under direct light or specific angles. They disappear temporarily if you wet the area with water. | Low (Polishing) |
Level 2. Base coat scratches | The scratch appears white or hazy. It does not disappear when wet, but the color of the car is still visible inside the groove. | Medium (Abrasive Compounding) |
Level 3. Deep scratches (primer/metal) | You can see a different color inside the scratch (grey primer or shiny silver metal). Signs of rust may be present. | High (Touch-up paint + Sanding) |
Correctly evaluating the depth is the cornerstone of the repair process because the treatment methods for different stages are diametrically opposed. polishing removes a microscopic layer of clear coat to level the surface, whereas touch-up painting adds material to fill a void.
Preparation: The Foundation of a Flawless Repair
Many novices make a fatal error that ruins their paint: they begin rubbing a dirty surface with a cloth. This acts like sandpaper, grinding dust and grit into the paint and creating hundreds of new defects around the original one. Preparation accounts for 50% of the success in detailing.
The Two-Bucket Wash Method
Wash the vehicle thoroughly using a pH-neutral automotive shampoo. Do not use dish soap, as it strips wax. Use the "two-bucket method": one bucket contains water with shampoo, and the second bucket contains plain water for rinsing your wash mitt. This ensures that the dirt you lift off the car does not get reintroduced to the paint. Pay special attention to the damaged area, ensuring no debris is lodged in the scratch.
Decontamination and Drying
Dry the surface using a high-quality, long-pile microfiber drying towel. There must be zero moisture remaining, especially if you intend to apply touch-up paint. Once dry, treat the area with a degreaser (isopropyl alcohol solution or a prep-solvent) to remove old wax, tar, and oils. This ensures that your repair materials bond directly to the paint, not to a layer of road grime.
The Clay Bar Treatment
If the surface feels rough to the touch even after washing (like sandpaper), use a synthetic clay bar. This tool pulls embedded contaminants (iron fallout, industrial dust, overspray) out of the clear coat pores. A smooth surface is essential for polishing.
Workspace Organization

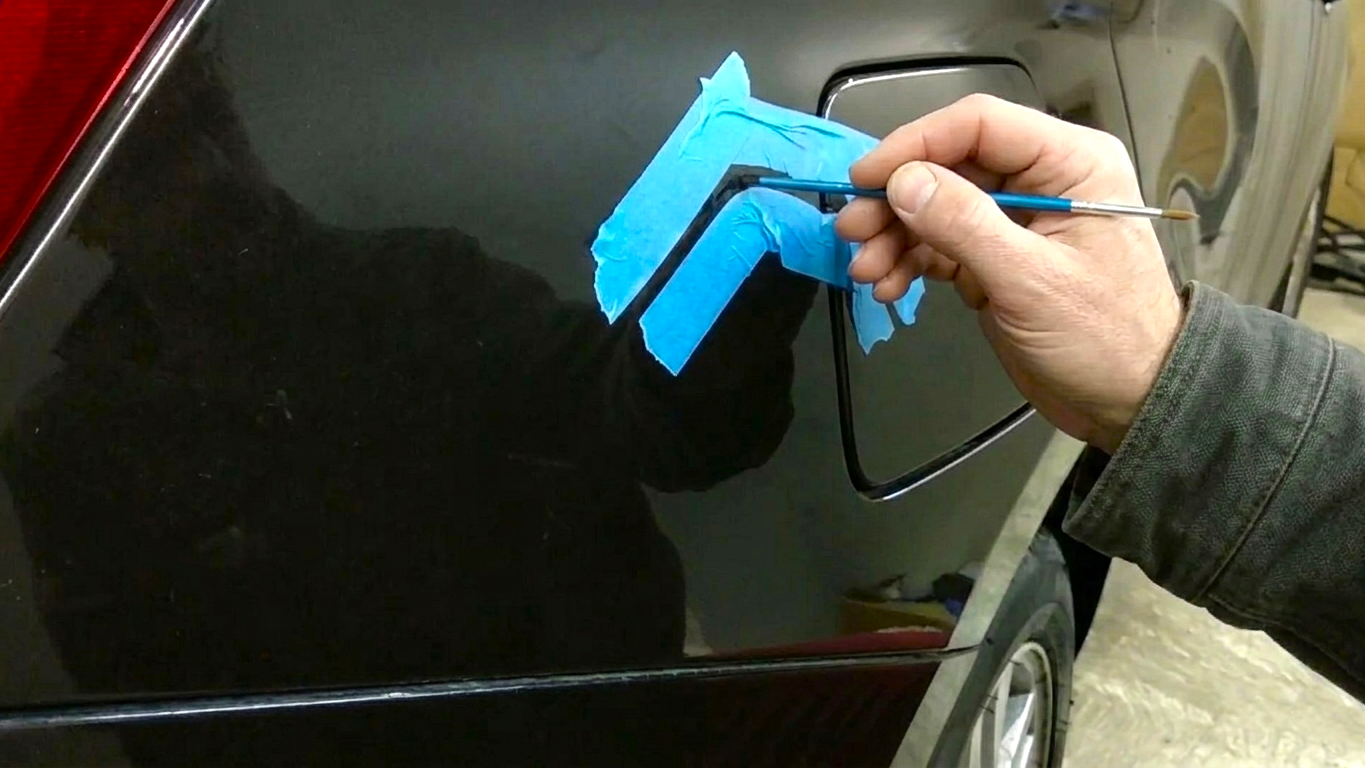
Inspect the scratch under excellent lighting. Ideally, use a dedicated inspection flashlight or a stand light that mimics the solar spectrum (high CRI). If working outdoors, choose an overcast day or work in the shade. Never work on hot paint or under direct scorching sunlight. Heat causes automotive chemicals to dry instantly, leaving difficult-to-remove residue and preventing abrasives from breaking down correctly.
Mask off surrounding areas with low-tack automotive masking tape. Cover plastic trim, rubber seals, and headlights near the work zone. Polishing compounds are notoriously difficult to remove from textured black plastic and can leave permanent white stains.
Removing Surface Scratches (Clear Coat Correction)
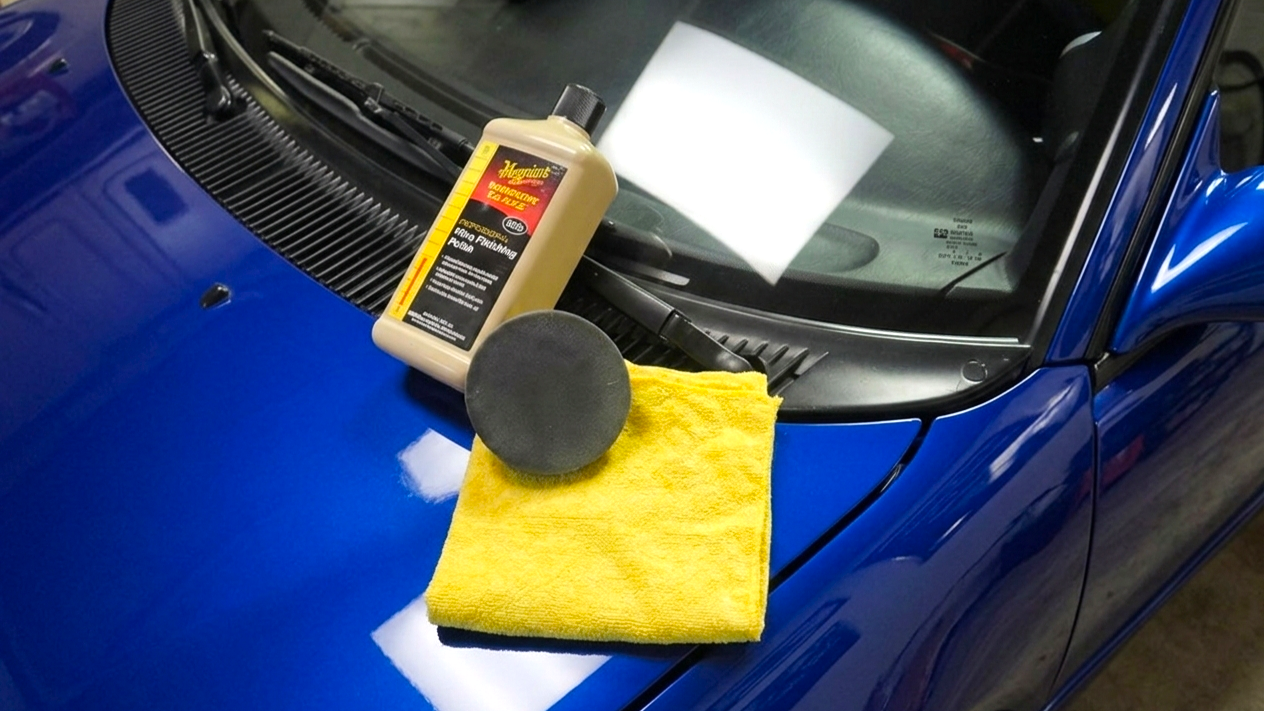
If the defect has only affected the transparent clear coat, your objective is not to fill the scratch, but to "level" the microscopic layer of clear coat surrounding it. By removing a few microns of the surrounding clear coat, you make the surface level with the bottom of the scratch, effectively making it disappear. For this, you need a high-quality car scratch remover.
Selecting the Right Product
For manual polishing, avoid heavy-duty rubbing compounds designed for rotary machines, as they can leave their own hazing marks if not broken down properly. Choose products labeled "Scratch Remover," "Swirl Remover," or "Fine Cut Polish." These typically contain "diminishing abrasives": the particles start large and aggressive to cut the defect, but as you work them, they break down into finer particles that polish the surface to a high gloss. Avoid cheap "scratch repair pens" that simply fill the gap with wax; they only mask the problem until the next car wash.
The polishing process:
- Priming the pad. Apply a small amount of the compound (about the size of a pea) onto a foam applicator pad or a dense microfiber cloth. Do not pour the product directly onto the car paint.
- Application. Begin working the compound into the scratch using circular motions to distribute it, then switch to a cross-hatch pattern (up-down, left-right). Apply moderate pressure. Your goal is to generate a small amount of heat and mechanically work the abrasives against the clear coat.
- The working cycle. Focus on a small section (4x4 inches). Do not attempt to polish half the hood at once. Rub for 1–2 minutes until the polish turns clear or oily. Wipe away the residue immediately with a clean microfiber towel.
- Inspection. Check the result under your inspection light. If the scratch is less visible but not gone, repeat the process.
- Protection. Once the defect is removed, the area is now "naked" paint. You must re-apply a protective wax or sealant, as the polishing process strips away any previous protection.
Expert Tip. If you are dealing with a long scratch, polish it in sections. Move your hand perpendicular to the direction of the scratch (across it), rather than parallel to it. This is the most effective way to smooth out the jagged edges of the clear coat fracture.
Treating Medium Scratches (Base Coat Restoration)
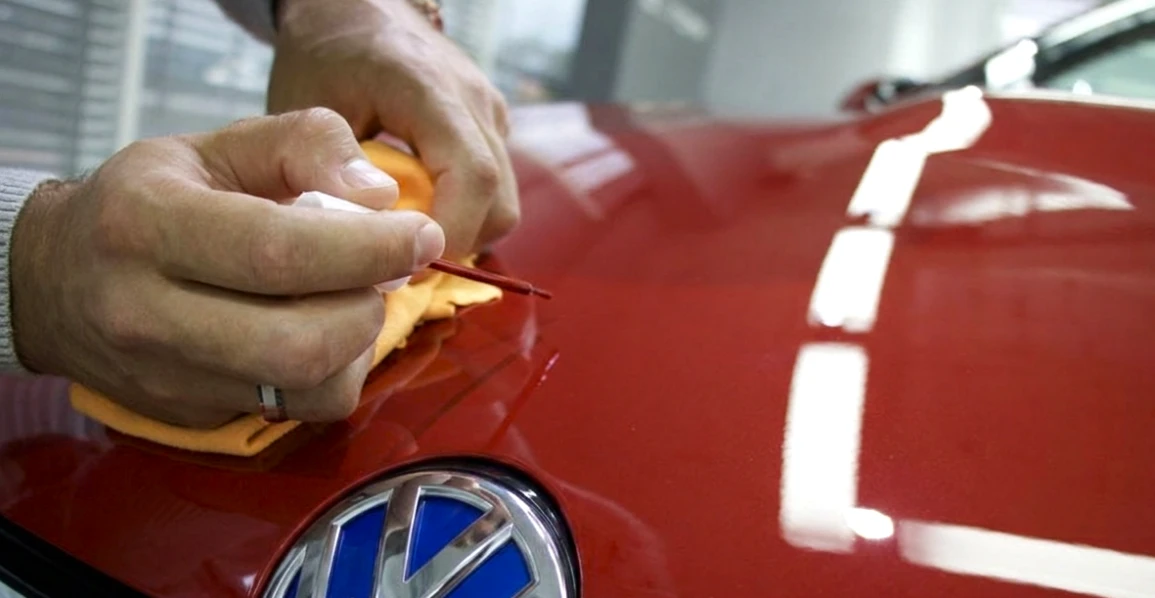
Medium scratches are those that have penetrated through the clear coat but stopped at the primer. Polishing alone cannot fix this, because there is no clear coat left in the valley of the scratch to level out. You need to add material. This is where you learn to fix scratches on car paint by acting like a surgeon.
Tools Required
You will need a touch-up paint kit matched strictly by your vehicle's VIN code. Generic colors found on supermarket shelves will never match perfectly and will stand out like a sore thumb. Also, purchase a set of toothpicks or extremely fine artist brushes (size 00 or 000). The brush attached to the cap of the touch-up bottle is usually too large and clumsy - it is like trying to write a letter with a mop.
The "Blob" Technique
- Paint preparation. Shake the base coat bottle vigorously for at least 2 minutes to mix the metallic flakes and pigment evenly.
- Application. Do not use the stock brush. Dip the very tip of a toothpick into the paint and gently touch it to the deepest part of the scratch. Capillary action will draw the paint off the toothpick and into the groove.
- Layering. Do not try to fill the scratch in one go. Paint shrinks as the solvents evaporate. Apply very thin layers, waiting 15–20 minutes between each application.
- Clear coat application. Once the color layer has covered the bottom of the scratch but is still sitting below the level of the surrounding original paint, let it dry (minimum 1 hour). Then, apply the clear coat from your kit using the same toothpick method. You want to build the clear coat up so it forms a slight "blob" or ridge that sits just above the surrounding surface. This is necessary because it will shrink as it cures.
Leveling and Wet Sanding (Expert Level)
After the clear coat blob has cured for at least 24 hours (48 is better), it will look like a small bump. To make it invisible, you must flatten it.
- Soak a small piece of wet-or-dry sandpaper (grit P2000 or P2500) in water for 15 minutes.
- Wrap the paper around a small sanding block (a rectangular eraser works well).
- Gently sand the clear coat blob using short strokes. Keep the area lubricated with water. Check your progress every 3-4 strokes.
- Stop immediately once the blob is level with the surrounding paint. The area will look dull and grey.
- Now, use your scratch remover compound (from Section 3) to polish out the sanding marks and restore the shine.
Repairing Deep Scratches (Metal and Rust)
Deep scratches that expose bare metal are critical emergencies for your car's bodywork. If the metal has already begun to oxidize (visible orange tint), the task becomes more complex.
Stage 1. Rust Elimination
If you simply paint over rust, it will continue to eat the metal from underneath the paint, eventually causing the paint to bubble and flake off months later.
- Use a sharp tool (like the edge of a hobby knife or a fiberglass rust pen) to physically scrape the oxidation out of the scratch channel.
- Treat the area locally with a zinc-based rust converter or inhibitor. Allow it to cure according to the manufacturer's instructions.
Stage 2. Priming
Paint does not adhere well to bare metal. You must use an anti-corrosion primer. Apply it in a microscopically thin layer only to the bottom of the scratch, ensuring it does not spill over onto the healthy clear coat. The toothpick is again your best friend here. Let the primer dry for 2–3 hours.
Stage 3. Painting and Blending
The process is identical to treating medium scratches, but it requires more patience due to the number of layers.
- Apply the base coat over the primer in multiple stages until the color is solid.
- Finish with the clear coat, creating the sacrificial "blob."
- Allow to cure for several days. Deep repairs hold solvents longer.
Stage 4. Final finishing
Perform the wet sanding technique (P2000–P3000 grit) to blend the new clear coat with the old. Follow up with a cutting compound and then a finishing polish. This ensures a seamless transition that is virtually undetectable to the eye.
Important Note! If the deep scratch covers a large area (for example, a "scuff" caused by scraping a wall that is the size of a hand), a touch-up brush repair will look messy and amateurish. In such cases, it is often better to use high-quality aerosol cans with 2K clear coat or consult a professional for a "blend panel" repair.
Prevention. The Best Protection Strategy
The most effective repair is the one you never have to perform. Protecting your vehicle's clear coat requires a systemic approach to maintenance and usage.
Washing Discipline
Approximately 80% of minor defects ("spider webbing" or swirls) are inflicted by the owner during the washing and drying process.
- Never wipe dust off a dry car with a cloth. This is essentially grinding silica (sand) into the paint.
- Avoid automatic "tunnel" car washes with stiff rotating bristles. These are scratch factories. Touchless washes are safer.
- Inspect your wash mitts and drying towels regularly. If you drop them on the ground, they must be washed before touching the car again.
Protective Coatings
- Waxes and sealants. These create a thin sacrificial layer. While they won't stop a key from scratching the door, they reduce friction and protect against environmental fallout.
- Ceramic coatings (nano-glass). These harden the surface of the clear coat, making it more resistant to chemical etching and light marring. They also provide hydrophobic properties that make washing safer.
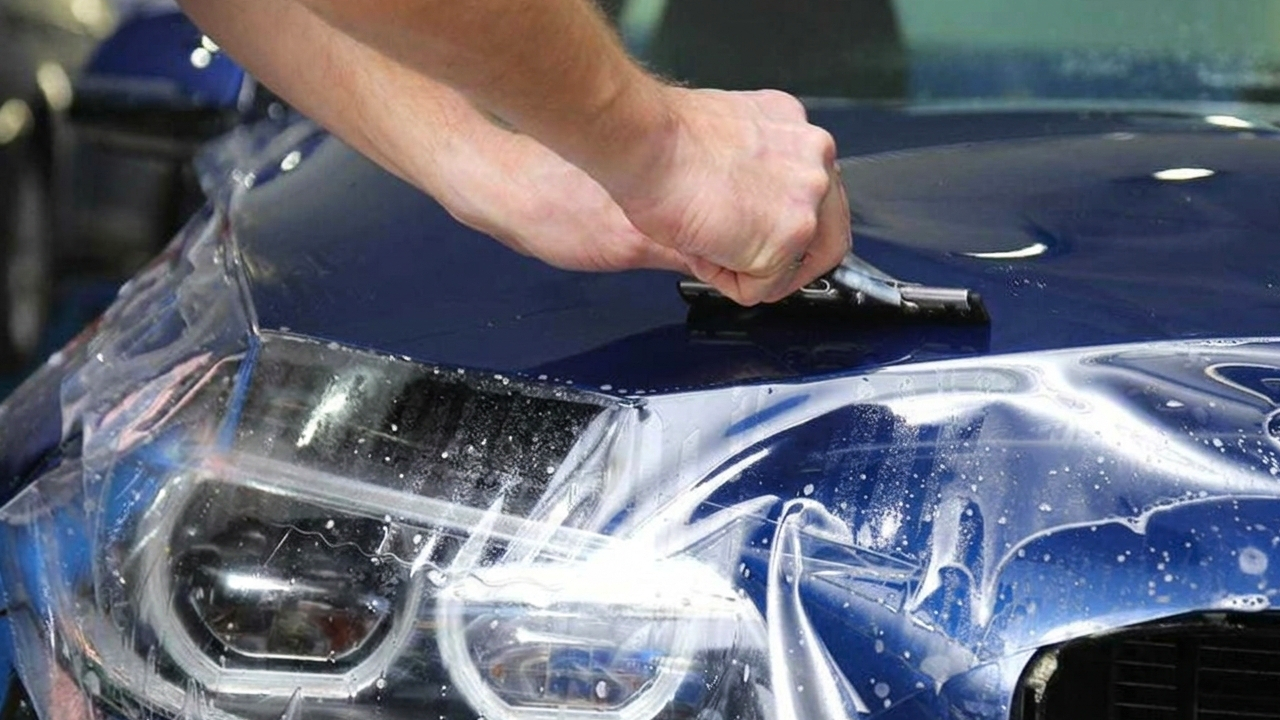
- Paint protection film (PPF). This is the best car scratch remover strategy simply because it prevents them entirely. A urethane film applied to high-impact areas (bumper, hood, mirrors) is self-healing. Heat from the sun or hot water causes the film to flow back together, erasing scratches automatically. It is the only true protection against rock chips.
Parking Logic
Adopt defensive parking habits. Park further away from store entrances where foot traffic and cart density are lower. Avoid parking under old trees (falling branches, sap, bird droppings) or too close to hedges. When parallel parking, ensure you leave enough room so that other drivers don't "bump" their way out of the spot.
Covers and Storage
If the vehicle is parked outside for extended periods, a high-quality, breathable car cover can protect the paint from UV degradation and accidental scratches from passersby. However, never put a cover on a dirty car. The wind will cause the cover to vibrate against the dirt, effectively sanding your paint down.
Conclusion
Restoring automotive paintwork is a meticulous process that requires patience, steady hands, and a respect for chemistry. Do not rush; allow layers to cure properly, and always invest in high-quality materials. Remember that scratches are not a death sentence for your car's appearance, but rather a call to action.
If you are unsure of your abilities or if the damage is extensive, it is wise to practice on an inconspicuous area (like the lower rocker panel) or consult a professional detailer. However, in the vast majority of cases, by following this guide, you can successfully eliminate up to 90% of defects yourself. Regular maintenance and knowing how to remove scratches from car surfaces not only keeps your vehicle looking pristine but also preserves the integrity of the bodywork against corrosion, ensuring your investment retains its value for years to come. Start caring for your paint today, and your car will reward you with a brilliant shine that commands respect on the road.
